The creation of the shuriken, often translated as "hidden hand blade," is a fascinating nexus of martial practice, clandestine operations, and artisanal skill. Its evolution from rudimentary tools to the iconic throwing stars of popular imagination speaks volumes about the history of espionage and combat in feudal Japan.
Table of Contents
Introduction: Beyond the Toy
While the image of the ninja wielding a paper shuriken might evoke a sense of playful imitation, the reality behind this iconic implement is steeped in rich historical context and practical application. This exploration delves beyond the mere folding of paper to understand the shuriken as a historical artifact, a cultural symbol, and a tangible object that can be recreated through the spirit of "Do It Yourself" (DIY) intellectual and practical engagement.
The intention of this article is to satisfy the search query of individuals interested in the historical origins of the shuriken, its anthropological significance, and, crucially, how to construct one using traditional origami techniques. We aim to provide a comprehensive understanding that bridges the gap between academic inquiry and hands-on learning.
Historical Roots of the Shuriken
The shuriken (手裏剣) is a traditional Japanese portable throwing weapon. Its etymology, translating to "hidden hand blade," immediately hints at its primary use: a discreet weapon employed by shinobi (ninjas) for distraction, incapacitation, or as a secondary offensive tool. Unlike the more prominently featured katana or kunai, the shuriken was often an improvised weapon, readily concealed and adaptable to various situations.
Historically, shuriken were not exclusively made of metal. While metal variants, such as the bo-shuriken (straight blade) and hira-shuriken or shaken (flat, multi-pointed blades), are more commonly depicted, materials like wood, bamboo, and even paper were utilized, particularly in forms that served less as lethal weapons and more as tools for misdirection or signaling.
The specific design of metal shuriken varied widely by region and by the school (ryū) of ninjutsu or martial arts. Some were sharpened at the tips, others designed to lodge into targets with their flat surfaces. Their use was often predicated on surprise, throwing them with accuracy to disrupt an opponent's balance, blind them with a near miss, or inflict minor wounds that could be fatal if infected.
The practice of ninjutsu itself is a complex field of study, often blending espionage, sabotage, infiltration, and assassination. The shuriken played a supporting, yet vital, role within this broader tactical framework. Its historical prevalence is documented in various classical martial arts manuals, though often shrouded in the secrecy inherent to shinobi traditions.
The Shuriken in Anthropology and Sociology
From an anthropological perspective, the shuriken serves as a fascinating case study in the development of specialized tools for specific societal roles. The creation and use of such implements reflect not only technological capabilities but also the social structures and prevailing conflicts of a given era.
The sociology of secrecy is intrinsically linked to the shuriken. Its very design and purpose embody the clandestine nature of the shinobi. This raises questions about the societal conditions that necessitate such specialized, hidden forms of combat and intelligence gathering. What does the existence of the shuriken tell us about the power dynamics and societal anxieties of feudal Japan?
Furthermore, the shuriken, particularly its paper rendition, can be analyzed through the lens of cultural transmission and popular representation. The transition from a tool of specialized warriors to a symbol in popular culture (through manga, anime, and film) highlights how objects acquire new meanings and functions as they traverse different social and temporal contexts. The DIY aspect of paper folding transforms the shuriken from an object of past conflict into a medium for creative expression and a way to connect with historical practices on a tangible level.
Victor Turner's concepts of liminality and communitas can even be loosely applied here. The act of folding paper into a new form, like a shuriken, is a liminal process – a transformation from one state to another. Engaging in this shared activity, perhaps with others, can foster a sense of communitas, a temporary solidarity based on the shared creative endeavor.
The shuriken is more than just a weapon; it's a tangible artifact of a bygone era, a testament to human ingenuity under pressure, and a symbol that has transcended its original context to inspire craft and curiosity across the globe.
The "Do It Yourself" (DIY) Approach to Origami Shuriken
The spirit of "Do It Yourself" is about empowerment through understanding and creation. Applying this to the origami shuriken means engaging with the practice not just as a passive viewer but as an active participant. It's about dissecting the process, understanding the mechanics, and replicating the form with one's own hands.
This hands-on approach offers several benefits:
- Enhanced Understanding: Physically folding the paper deepens one's appreciation for the precision and geometric principles involved.
- Skill Development: It hones fine motor skills and spatial reasoning.
- Connection to History: It provides a tangible link to the historical practices associated with the shuriken, albeit in a non-lethal form.
- Creative Outlet: Origami is a mindful activity that can be both relaxing and rewarding.
The original video this post references aimed to improve clarity in assembly, recognizing that the transition from flat units to a three-dimensional star could be a stumbling block. Our DIY guide seeks to build upon that pedagogical insight, offering a clear, step-by-step process.
DIY Guide: Crafting Your Own Origami Shuriken
To create your own paper shuriken, you will need two square pieces of paper. Standard origami paper works best, but any paper cut into perfect squares will suffice. The key is precision in folding.
- Prepare Your Squares: Ensure you have two identical square pieces of paper. You can cut these from larger sheets.
- Fold Each Square in Half: Take one square and fold it in half horizontally, then unfold. Fold it in half vertically, then unfold. You should now have creases dividing the square into four smaller quadrants.
- Fold Towards the Center: Take the top edge and fold it down to meet the horizontal center crease. Repeat with the bottom edge, folding it up to the center crease.
- Fold Again: Take the top folded edge and fold it down to the center crease again. Repeat with the bottom folded edge, folding it up to the center crease. You should now have a long, thin rectangle.
- Fold in Half Lengthwise: Fold this long rectangle in half lengthwise, creasing firmly.
- Create the First Blade: Unfold the last fold. Now, take one of the outer edges and fold it diagonally towards the center, aligning it with the center crease. This forms a diagonal line.
- Repeat for the Other Side: On the same side, take the opposite outer edge and fold it diagonally in the opposite direction, meeting the center crease. You should now have a shape resembling a kite or a pointed arrowhead.
- Repeat for the Second Square: Perform steps 2 through 7 with your second square of paper. You will now have two identical, pointed units.
- Interlocking the Units: Take your two completed units. Align them perpendicularly, forming a cross shape.
- Tucking the Flaps: Carefully tuck the pointed tip of one unit into the corresponding slit on the other unit. Ensure they are securely interlocked. This is often the trickiest part and requires patience.
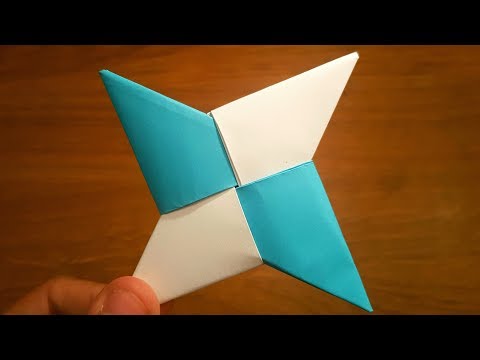
- Final Assembly: Once both tips are tucked in, gently adjust and flatten the shuriken. You should have a four-pointed star shape.
Experiment with different sizes and types of paper to see how it affects the final product. Remember, practice makes perfect, especially with origami!
Frequently Asked Questions
What is the historical significance of the shuriken?
Historically, the shuriken was a discreet, often improvised weapon used by Japanese shinobi (ninjas) for distraction, incapacitation, or as a secondary offensive tool, embodying the clandestine nature of their operations.
Can paper shuriken be used as weapons?
Origami shuriken are primarily for craft and recreational purposes. While they mimic the form of historical weapons, they are not designed for combat and lack the sharpness and weight of traditional metal shuriken.
What are the main types of historical shuriken?
The two main categories are bo-shuriken (straight, rod-like blades) and hira-shuriken or shaken (flat, multi-pointed blades), though various other forms and materials were historically used.
Why is origami a good DIY activity for learning about the shuriken?
Origami allows for a hands-on, tactile engagement with the shuriken's form, enhancing understanding of its geometry and historical context in a safe, accessible, and creative manner.
How difficult is it to fold an origami shuriken?
The folding process can range from moderately easy to challenging, particularly the final assembly where interlocking the units requires precision and patience. Following a detailed guide, like the one provided, significantly aids the process.
Conclusion: Folding History into Practice
The journey from the intricate historical uses of the shuriken to the simple act of folding paper reveals a profound connection between past practices and present creativity. By understanding the historical context, the anthropological implications, and engaging in the practical creation through DIY origami, we not only learn about a specific artifact but also about the enduring human drive to innovate, conceal, and express.
This exploration of the origami shuriken demonstrates that academic knowledge need not remain purely theoretical. It can be embodied, experienced, and shared through practical application. We encourage you to try crafting your own paper shuriken and to reflect on the history held within its folded forms. Share your experiences and insights in the comments below!
